

Max1mus
Active Member
As requested by a member on the forum; I will demonstrate my ear posting technique below. I adapted most of my technique from JanS DIY ear post so a big thank you to Jan  . After trying different techniques of ear posting, I found this to be the best for me. If you have a very active dog that plays rough with other dogs it can be very frustrating to see the ear post popping out. Another advantage is that it will keep the ears very straight and extended upward with no bending of the post. I only wish I had done this earlier when maximus first got his ears cropped.
Okay, lets start. Here are the supplies that you will need.
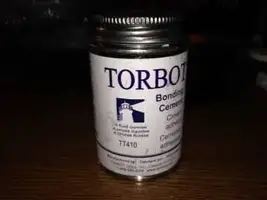
Torbot medical bonding cement. I've found that Torbot's dries quicker and is stickier than the other skin bond glue brands.
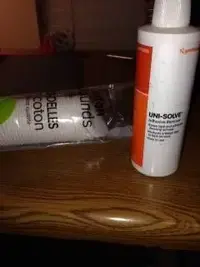
Cotton pads and Uni-Solve for removing the cement/glue when its time to change out posts.

Zonas porous tape and Gauze.
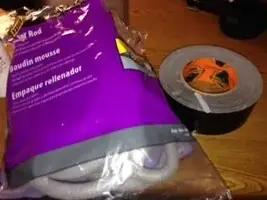
Backer rod and Gorilla Double thick strongest ductape. I prefer this gorilla tape over regular ductape because its much thicker and prevents the backer rod from bending. You will only need 2 strips of gorilla duct tape for each rod so you end up saving time and using less tape.
You want to start by cutting the proper length of your backer rods to fit your dog's ears. Make sure you really stick the rod down the dog's ear to measure the length. Then, use 2 strips of tape and wrap it around the rods leaving about 1/2 inch uncover. This part will go into your dog's ear canal.

I like to trim the uncovered portion and wrap gauze around it to prevent dirt from getting into the dog's ears.

Now, get your Torbot's glue and put a little on the gorilla tape part. This will prevent the porous tape from sliding around when you wrap the non-adhesive side of porous tape around the backer rod.
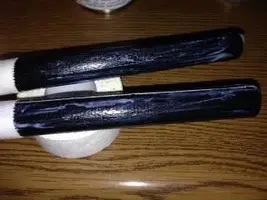
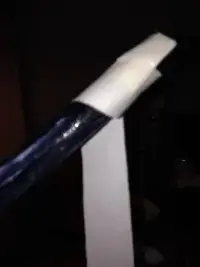
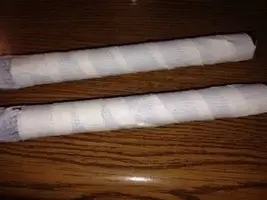
I like to put a piece of black athletic tape to cover about 1/2 of the white porous tape. This is optional but it prevents dirt and grass from sticking onto the visible sticky part of the tape.

Now, put a layer of glue on your dog's ears like this and let it dry for a minute or 2. Careful to not get glue in the ear canal.
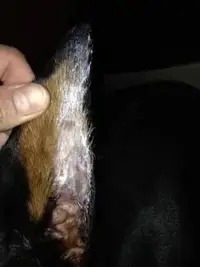
Then, put 2-3 layers of glue on the adhesive side of the porous tape/backer rod like this. Again let the glue dry for a minute or 2.

Finally, stick the backer rod deep into the ear canal and really pull the ear up as high you can. Sometimes, the pup will tilt his head at a weird angle so make sure the ears are pull up at an angle to match their natural ear to head position. The post will be very sticky so make sure you do it right on the first contact. I like to start from the bottom and go up.
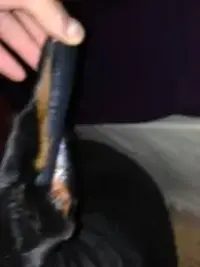
I notice that when you remove the posts, most of the glue will work its way to the more adhesive side of the porous tape, leaving less glue on the ears. Thus, make it less messy and easier to remove with the Uni-Solve adhesive remover. If you have an active dog that likes to play rough with other dogs, the post will last about 4 days. Normally, it is good for up to 7 days but its probably best to change them out every 5 days.
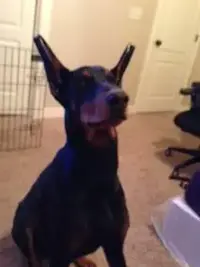
The ears should angle out a little like this when the ears are relaxed like this:
Here is 2 old pics of how they look when you remove the posts.
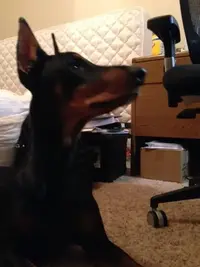
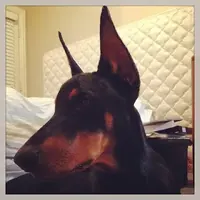
Its pretty late and I've been up since 5 am so if there is anything that doesn't make sense please lmk. Hope this helps.
. After trying different techniques of ear posting, I found this to be the best for me. If you have a very active dog that plays rough with other dogs it can be very frustrating to see the ear post popping out. Another advantage is that it will keep the ears very straight and extended upward with no bending of the post. I only wish I had done this earlier when maximus first got his ears cropped.Okay, lets start. Here are the supplies that you will need.
Torbot medical bonding cement. I've found that Torbot's dries quicker and is stickier than the other skin bond glue brands.
Cotton pads and Uni-Solve for removing the cement/glue when its time to change out posts.
Zonas porous tape and Gauze.
Backer rod and Gorilla Double thick strongest ductape. I prefer this gorilla tape over regular ductape because its much thicker and prevents the backer rod from bending. You will only need 2 strips of gorilla duct tape for each rod so you end up saving time and using less tape.
You want to start by cutting the proper length of your backer rods to fit your dog's ears. Make sure you really stick the rod down the dog's ear to measure the length. Then, use 2 strips of tape and wrap it around the rods leaving about 1/2 inch uncover. This part will go into your dog's ear canal.
I like to trim the uncovered portion and wrap gauze around it to prevent dirt from getting into the dog's ears.
Now, get your Torbot's glue and put a little on the gorilla tape part. This will prevent the porous tape from sliding around when you wrap the non-adhesive side of porous tape around the backer rod.
I like to put a piece of black athletic tape to cover about 1/2 of the white porous tape. This is optional but it prevents dirt and grass from sticking onto the visible sticky part of the tape.
Now, put a layer of glue on your dog's ears like this and let it dry for a minute or 2. Careful to not get glue in the ear canal.
Then, put 2-3 layers of glue on the adhesive side of the porous tape/backer rod like this. Again let the glue dry for a minute or 2.
Finally, stick the backer rod deep into the ear canal and really pull the ear up as high you can. Sometimes, the pup will tilt his head at a weird angle so make sure the ears are pull up at an angle to match their natural ear to head position. The post will be very sticky so make sure you do it right on the first contact. I like to start from the bottom and go up.
I notice that when you remove the posts, most of the glue will work its way to the more adhesive side of the porous tape, leaving less glue on the ears. Thus, make it less messy and easier to remove with the Uni-Solve adhesive remover. If you have an active dog that likes to play rough with other dogs, the post will last about 4 days. Normally, it is good for up to 7 days but its probably best to change them out every 5 days.
The ears should angle out a little like this when the ears are relaxed like this:
Here is 2 old pics of how they look when you remove the posts.
Its pretty late and I've been up since 5 am so if there is anything that doesn't make sense please lmk. Hope this helps.


