

Doberman ear posting - improved method
Over the years I’ve been tweaking the basic backer rod method and this way of doing it is by far the most effective and easiest of anything I’ve tried, so now that we have a new pup for a model (thank you Albert), I wanted to put a tutorial together for the rest of you.
This is not only a minimal tape method, but it also makes for stress free post changing for you and your pup and no loss of hair on the backs of the ears. This method also does not require the tedious back taping that many require and makes for a much smoother and stable post.
Before starting any type of ear posting please make sure your pups ears are healed and free of infection. Always clean the ear canal out well before beginning!
Supplies:
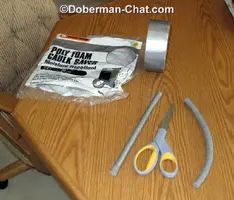
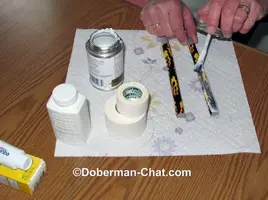
Backer rod, sometimes called caulk saver. Young pups usually need ½” and as they grow they will move up to 5/8”. This is easily found in the caulk department at home improvement stores like Lowe’s.
Duct tape. Any basic duct tape will work and it’s the backbone of your posts integrity. Most of the tape shown in the photos is some of the fun colored stuff you can buy at places like Wal-Mart, but the basic grey tape will work just as well.
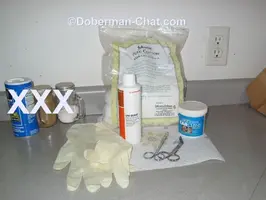
Medical scissors with the flat tip at the end work best.
And here's where you can order some of the supplies you usually can't find locally.
Curity Porous Tape BY KENDALL 1in 2531
Osto-Bond Skin Bond Adhesive OSTOBOND, OSTOBOND, Montreal Ostomy Ostomy Care, Ostomy Accessories
UniSolve Adhesive Remover by Smith & Nephew BUY at Vitality Medical 402300, 402300, 59402500, 59402500
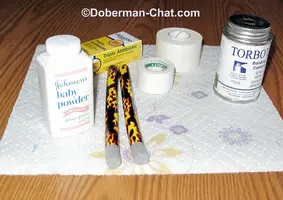
Baby powder for the hair side of the ears for easy tape removal.
Antibiotic ointment to put on the end of the posts inside the ear.
Kendall Curity 1” porous tape or Zona’s tape. Two pieces approximately 5” long, two pieces approximately 3” long and one piece about 10 – 12” long for the center brace.
Surgical adhesive
Many of the tape and adhesive products are available at your local medical supply store, but if you can’t find them locally here’s a great source. Nature's Farmacy
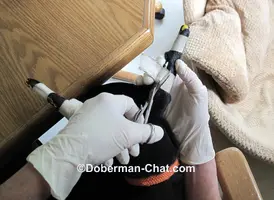
Measure the length you want to cut your pieces of backer rod off by measuring from the bottom of the bell or flare of the ear to the tip and go an extra inch. I keep one sample so I don’t have to do it every time, then measure the new posts from there.
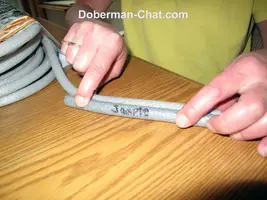
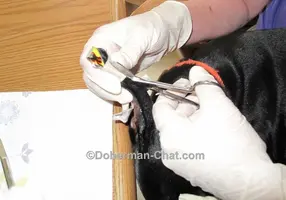
You will want to measure your duct tape with the post leaving the bottom 1/2” or so exposed, which is the part that goes into the ear canal.
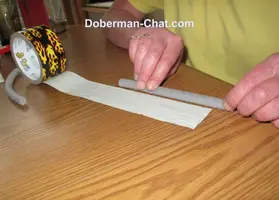
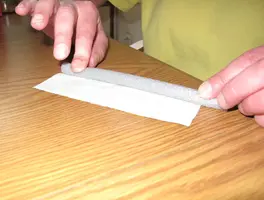
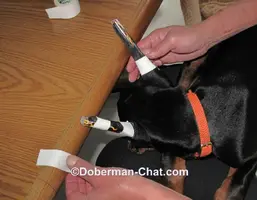
Tape the backer rod lengthwise starting at the edge of the tape as shown keeping it as smooth and straight as possible.
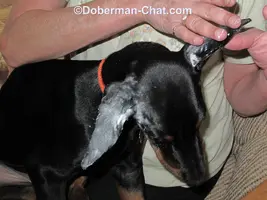
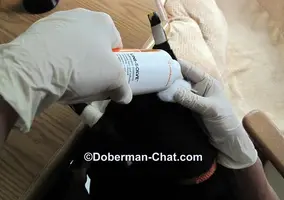
Apply baby powder to the hair side of the ears to keep the tape from sticking and pulling it off during removal.
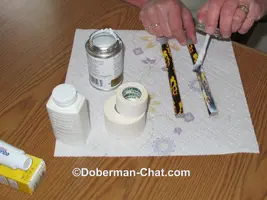
Apply an even and fairly sparse coat of adhesive to one side only of the post, which will face toward the inside of the ear.
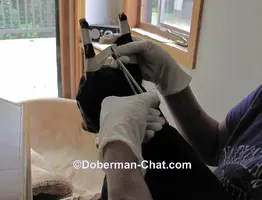
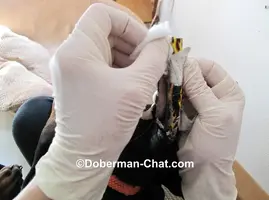
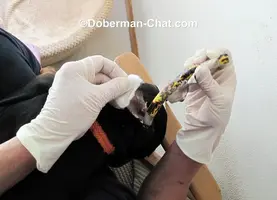
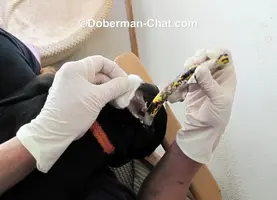
Now apply a coat of adhesive to the inside of your pups ear as shown and let dry until there is almost no stickiness left when you touch it – approximately 4 – 5 minutes. This totally eliminates the need for back taping and holds them in place much better. Note: only apply down to the ear lobe and not into the canal.
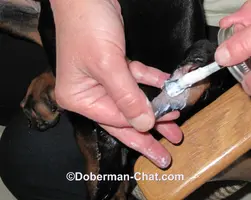
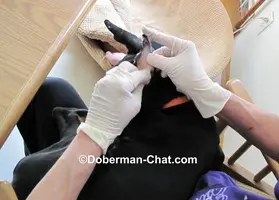
After the adhesive has dried it’s time to insert the post. Pull the ear back slightly and make sure to get the post down to the bottom of the ear canal – you will be able to tell when it goes all the way down and you do not have to worry about ear drum damage the way their ears are formed. The post should go straight up the center of the ear or closer to the uncut edge.
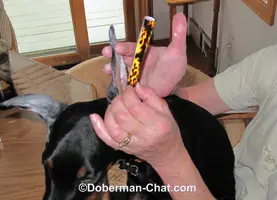
Now stretch the ear tight and attach it to the glued post and smooth into place. Notice how well they stick all by themselves.
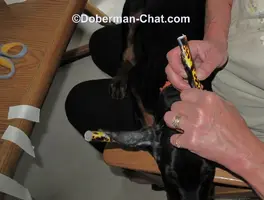
Apply the two 5” pieces toward the bottom of the ear as shown making sure that the natural ear flap folds in toward the inside of the head and in the same direction as the tape. Start the tape on the post and loosely wrap it making sure it’s not cutting off circulation – very important.
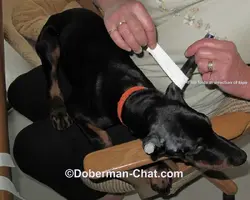
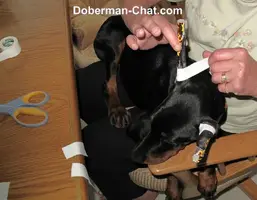
Apply the top tape in the same manner.
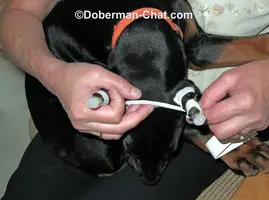
The last step is the center brace which is only needed until they gain control of their ears, which is usually about 3 postings or until there is always slack in the center brace. Space the ears so they are slightly out and not pointing straight up from the head as shown. Again start your tape on the tape on one of the posts going across the front first, then around the back and press the two sides together.
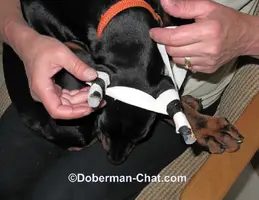
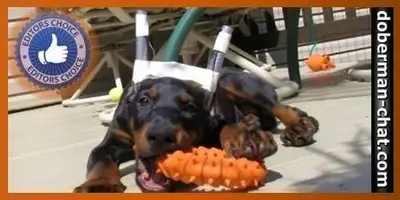
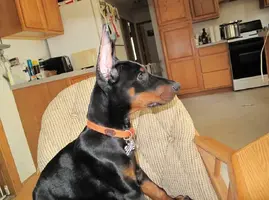
And how it should look when it’s done.
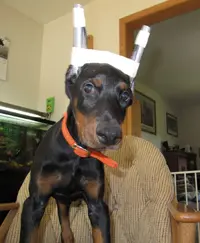
Please feel free to ask any questions as you go and part two will be simple post removal, which needs to be done in 4 – 5 days with this method, unless you find a problem or suspect an infection.
One other note: be sure not to let the posts get wet since the tape will tighten on the ears as it dries and cut off the pups circulation.
As an additional note: It used to be recommended to wrap the whole bell, but that practice has since been dropped since it does nothing to help the ear stance and only invites infection since the ear canal can't breathe at all.
Over the years I’ve been tweaking the basic backer rod method and this way of doing it is by far the most effective and easiest of anything I’ve tried, so now that we have a new pup for a model (thank you Albert), I wanted to put a tutorial together for the rest of you.
This is not only a minimal tape method, but it also makes for stress free post changing for you and your pup and no loss of hair on the backs of the ears. This method also does not require the tedious back taping that many require and makes for a much smoother and stable post.
Before starting any type of ear posting please make sure your pups ears are healed and free of infection. Always clean the ear canal out well before beginning!
Supplies:
Backer rod, sometimes called caulk saver. Young pups usually need ½” and as they grow they will move up to 5/8”. This is easily found in the caulk department at home improvement stores like Lowe’s.
Duct tape. Any basic duct tape will work and it’s the backbone of your posts integrity. Most of the tape shown in the photos is some of the fun colored stuff you can buy at places like Wal-Mart, but the basic grey tape will work just as well.
Medical scissors with the flat tip at the end work best.
And here's where you can order some of the supplies you usually can't find locally.
Curity Porous Tape BY KENDALL 1in 2531
Osto-Bond Skin Bond Adhesive OSTOBOND, OSTOBOND, Montreal Ostomy Ostomy Care, Ostomy Accessories
UniSolve Adhesive Remover by Smith & Nephew BUY at Vitality Medical 402300, 402300, 59402500, 59402500
Baby powder for the hair side of the ears for easy tape removal.
Antibiotic ointment to put on the end of the posts inside the ear.
Kendall Curity 1” porous tape or Zona’s tape. Two pieces approximately 5” long, two pieces approximately 3” long and one piece about 10 – 12” long for the center brace.
Surgical adhesive
Many of the tape and adhesive products are available at your local medical supply store, but if you can’t find them locally here’s a great source. Nature's Farmacy
Measure the length you want to cut your pieces of backer rod off by measuring from the bottom of the bell or flare of the ear to the tip and go an extra inch. I keep one sample so I don’t have to do it every time, then measure the new posts from there.
You will want to measure your duct tape with the post leaving the bottom 1/2” or so exposed, which is the part that goes into the ear canal.
Tape the backer rod lengthwise starting at the edge of the tape as shown keeping it as smooth and straight as possible.
Apply baby powder to the hair side of the ears to keep the tape from sticking and pulling it off during removal.
Apply an even and fairly sparse coat of adhesive to one side only of the post, which will face toward the inside of the ear.
Now apply a coat of adhesive to the inside of your pups ear as shown and let dry until there is almost no stickiness left when you touch it – approximately 4 – 5 minutes. This totally eliminates the need for back taping and holds them in place much better. Note: only apply down to the ear lobe and not into the canal.
After the adhesive has dried it’s time to insert the post. Pull the ear back slightly and make sure to get the post down to the bottom of the ear canal – you will be able to tell when it goes all the way down and you do not have to worry about ear drum damage the way their ears are formed. The post should go straight up the center of the ear or closer to the uncut edge.
Now stretch the ear tight and attach it to the glued post and smooth into place. Notice how well they stick all by themselves.
Apply the two 5” pieces toward the bottom of the ear as shown making sure that the natural ear flap folds in toward the inside of the head and in the same direction as the tape. Start the tape on the post and loosely wrap it making sure it’s not cutting off circulation – very important.
Apply the top tape in the same manner.
The last step is the center brace which is only needed until they gain control of their ears, which is usually about 3 postings or until there is always slack in the center brace. Space the ears so they are slightly out and not pointing straight up from the head as shown. Again start your tape on the tape on one of the posts going across the front first, then around the back and press the two sides together.
And how it should look when it’s done.
Please feel free to ask any questions as you go and part two will be simple post removal, which needs to be done in 4 – 5 days with this method, unless you find a problem or suspect an infection.
One other note: be sure not to let the posts get wet since the tape will tighten on the ears as it dries and cut off the pups circulation.
As an additional note: It used to be recommended to wrap the whole bell, but that practice has since been dropped since it does nothing to help the ear stance and only invites infection since the ear canal can't breathe at all.



 but i bet this is a big help for all those who get puppies great pictures and instructions Jan


 We're going to wait and see how Suzan does it first.




 I continue to use some barbecue stick and put some cotton on the edges top and bottom of the stick just to improvise


